Speed
1. Control speed between keyframes
When you animate spatial attributes, including position, anchor point, and effect control point attributes, the motion appears as a motion path.
In the Layers panel, the interval between points on a motion path represents speed. Depending on the frame rate of the project, each point represents a frame. A uniform interval indicates a constant speed, and a larger interval indicates a higher speed. (See Motion paths.)
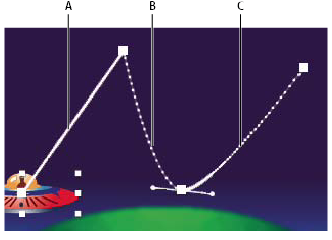
Motion path in Composition panel (top)
A. Dots are close together, indicating lower speed. B. Dots are far apart, indicating greater speed. C. Inconsistent spacing of dots indicates changing speed.
The following factors affect the speed at which a property value changes:
● The time difference between keyframes in the Timeline panel. The shorter the time interval between keyframes, the more quickly the layer has to change to reach the next keyframe value. If the interval is longer, the layer changes more slowly, because it must make the change over a longer period of time. You can adjust the rate of change by moving keyframes forward or backward along the timeline.
● The difference between the values of adjacent keyframes. A large difference between keyframe values, such as the difference between 75% and 20% opacity, creates a faster rate of change than a smaller difference, such as the difference between 30% and 20% opacity. You can adjust the rate of change by increasing or decreasing the value of a layer property at a keyframe.
2. Controlling speed between keyframes
● In the Composition or Layer panel, adjust the spatial distance between two keyframes on the motion path. Increase speed by moving one keyframe position farther away from the other, or decrease speed by moving one keyframe position closer to the other.
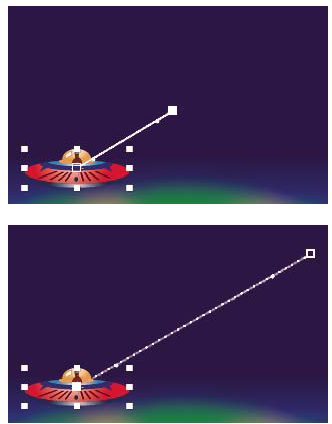
More spatial distance between keyframes increases layer speed.
● In layer bar mode, adjust the time difference between two keyframes. Decrease speed by moving one keyframe farther away from the other, or increase speed by moving one keyframe closer to the other.
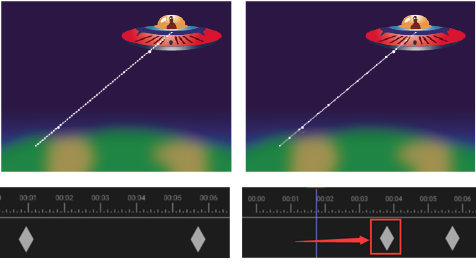
Shorter temporal distance between keyframes increases layer speed.
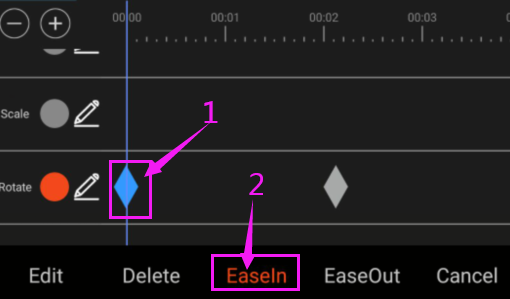
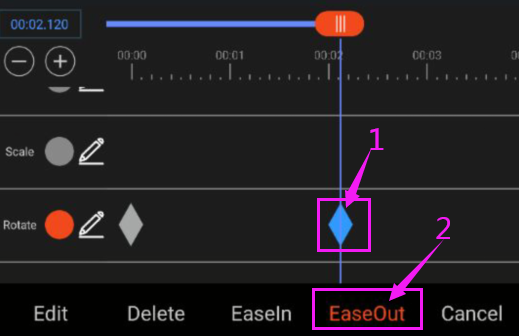
● Ease in and out effects. By adding ease-in or ease-out effects to keyframes, you can slow down the running speed near keyframes. That is, the speed between key frames is not constant, but an acceleration or deceleration process.