Layer properties
1. Coordinate system: project space and layer space
The coordinate system of each layer is its layer space. The coordinate system of each item is its item space. The attribute values of items that exist in the layer, such as effect control points and anchor points, are in layer space and are measured from the origin in the layer space of the layer. However, the layer's Position property describes the layer's position in the composition, so it is measured in the project space of the project.
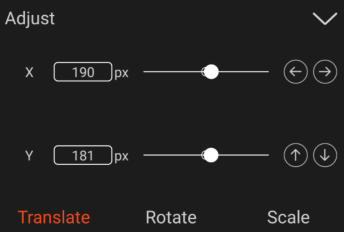
The X coordinate represents the position on the horizontal axis, and the Y coordinate represents the position on the vertical axis. The values of these coordinates are in pixels or percentages. The X and Y coordinates are relative to the origin (0,0), which is fixed at the upper left corner of the layer.
Move layers in space
When you move a layer in space, its Position property is modified.
You can split the components of the Position attribute into a single attribute (X position, Y position, and (for 3D layers) Z position), and the split dimension allows you to perform the position of the layer along the x, y, and z axes, respectively Modify or animate.
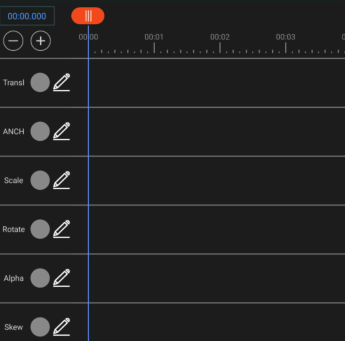
2. Layer properties
Each layer has attributes, and you can modify many of them and animate them. Each layer has a basic attribute group, the Transform group, which includes the Position and Opacity attributes. When you add certain features to a layer (for example, by adding a mask or effect, or by converting a layer to a 3D layer), the layer gets additional attributes collected in the attribute group.
All layer properties are temporal, and they change layers over time. Some layer properties, such as Opacity, have only time components. Some layer properties, such as Location, are also spatial, and they can move a layer or its pixels across project space.
3. Set a property value
To set or modify property values in flat space, there are 2 ways:
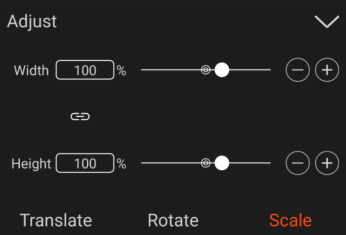
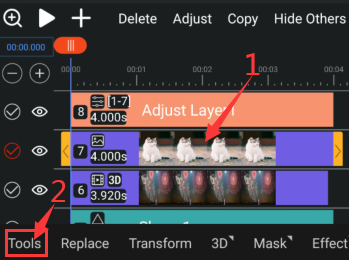
① Please select this layer and click Adjust to set the attribute value.
Note : This method can only set the values of the three attributes of movement, rotation and scaling.
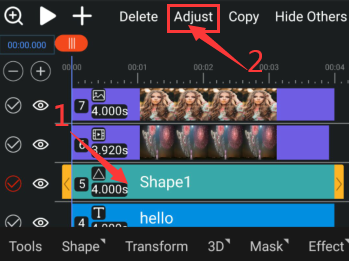
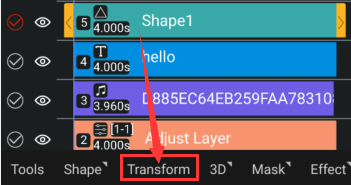
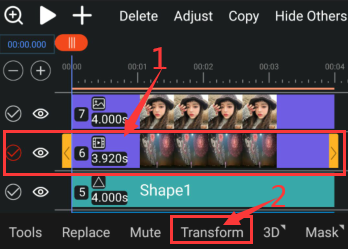
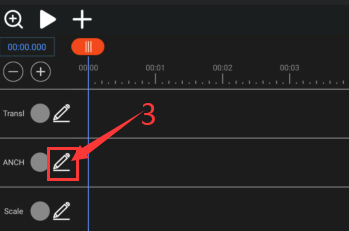
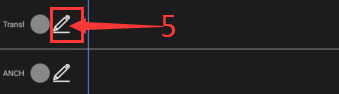
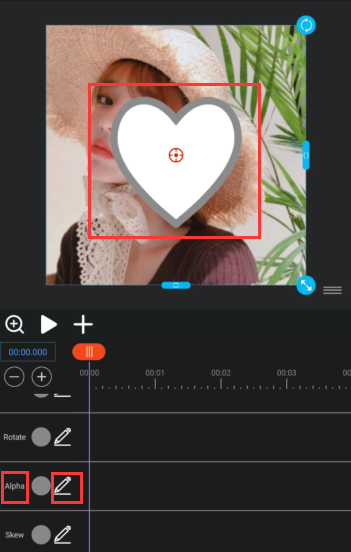
② Please select the layer, click "Transform", and then click the pencil icon to the right of the attribute name to modify the attribute value.
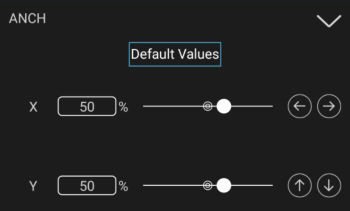
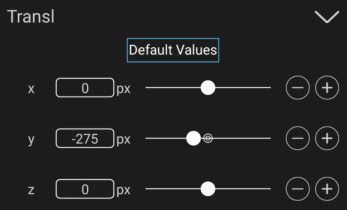
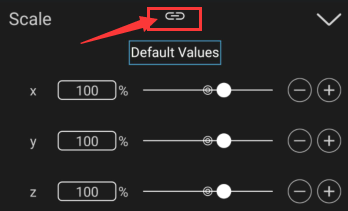
To reset an attribute in an attribute group to its default value, click Default Value above the attribute value.
To animate attributes, see How to make animation.
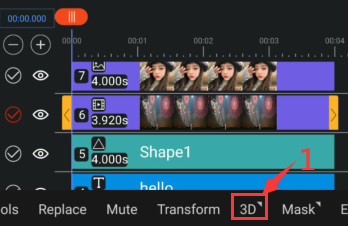
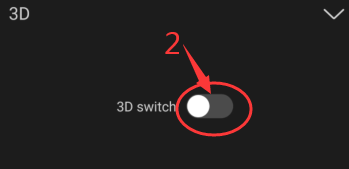
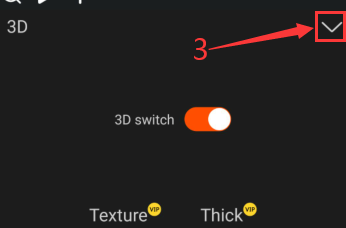
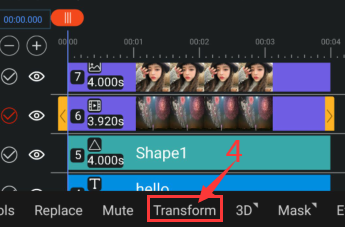
To set the property value or make an animation in 3D space, select the layer, click 3D, turn on the 3D switch, go back, click Transform, and then click the pencil icon to the right of the property name to modify the property value.
4. Layer anchor points
Transformations, such as rotation and scale, occur around the anchor point (sometimes called transformation point or transformation center) of the layer. By default, the anchor point  for most layer types is at the center of the layer.
Though there are times when you’ll want to animate the anchor point, it’s most common to set the anchor point for a layer before you begin animating. For example, if you’re animating an image of a person made up of one layer for each body part, you’ll probably want to move the anchor point of each hand to the wrist area so that the hand rotates around that point for the whole animation.
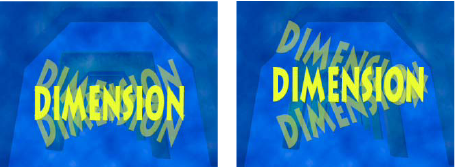
Comparison of the anchor point in the center of the text layer (left) and the anchor point moved to the end of the text layer (right).
To move the anchor point of the layer, click Transform> ANCH.
The default anchor point position is X, Y (50,50)%, and the default anchor point position in 3D space is X, Y, Z (50%, 50%, 0px).
5. Scale or flip a layer
As with other transformations, scaling of a layer occurs around the anchor point of the layer. If you move the anchor point away from the center of the layer, the layer may move when you flip it. Some layers—such as camera, light, and audio-only layers—don’t have a Scale property.
To flip a layer is to multiply the horizontal or vertical component of its Scale property value by -1. A layer flips around its anchor point.
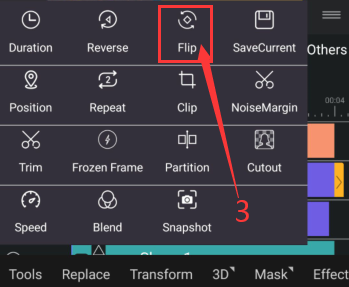
● To flip selected layers, choose Layer > Tools> Flip,then click the icon.
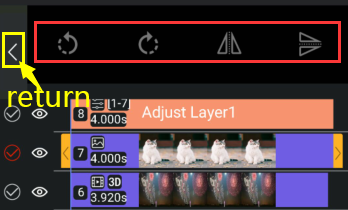
 This icon indicates a rotation of 90 degrees (counterclockwise).
 This icon indicates a rotation of 90 degrees (clockwise).
 This icon indicates horizontal flip.
 This icon indicates vertical flip.
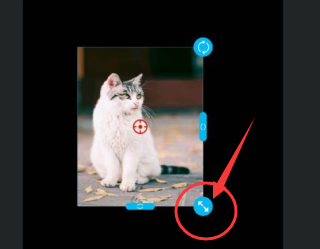
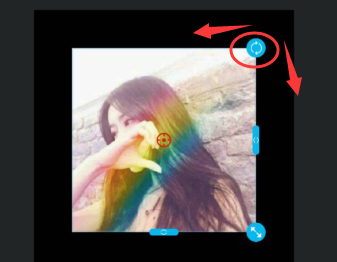
● To scale the layer freely, drag the layer handle in the bottom right corner.
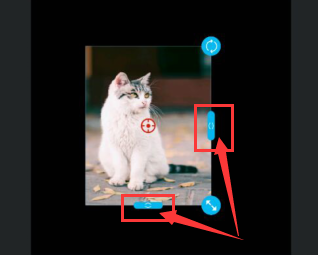
● To scale only one dimension, drag the layer handle on one side.
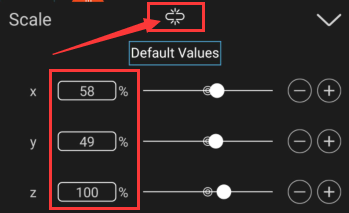
● To scale a layer out of proportions, select the layer> Transform, click the Pencil icon to the right of the Zoom attribute, then click the Constrained Scale icon above the attribute value  , then x, y, or z Enter new value for scaling.
6. Rotate a 2D layer
As with other transformations, rotation of a layer occurs around the anchor point of the layer.
To rotate the layer freely, drag the layer handle at the top right corner to rotate left or right.
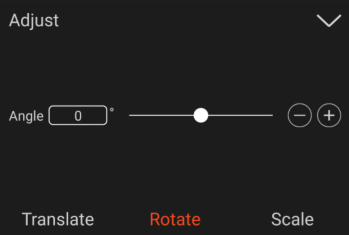
To rotate the layer exactly, click Adjust or Transform to modify the rotation attribute value.
The first part of the Rotation attribute value is the degree of partial rotation; the second part is the number of complete rotations.
7. Layer opacity
To make the entire layer uniformly transparent or translucent, modify the Opacity property of its transform group.

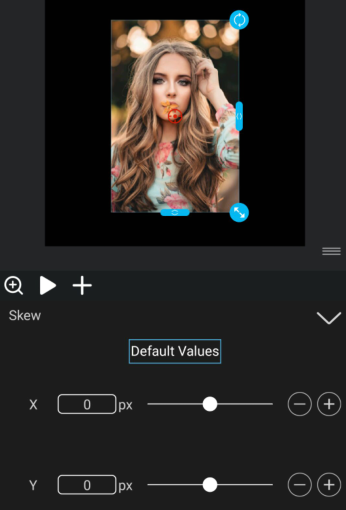
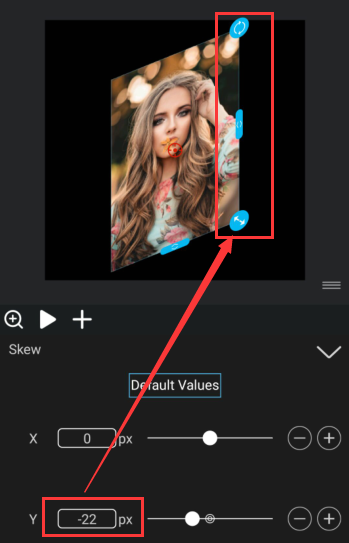
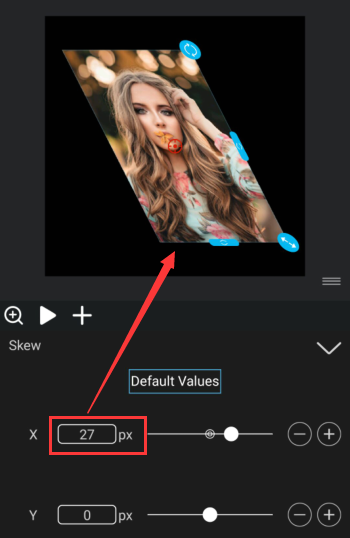
8. Beveled layer
Bevel cuts the image by repositioning each of its four corner values for the X axis. This effect can be used to stretch, shrink, tilt, or twist an image, or simulate perspective or movement that starts from the edge of a layer, such as opening a door.
To make a layer beveled, modify the Bevel property of its transform group.