Masks
1. About masks
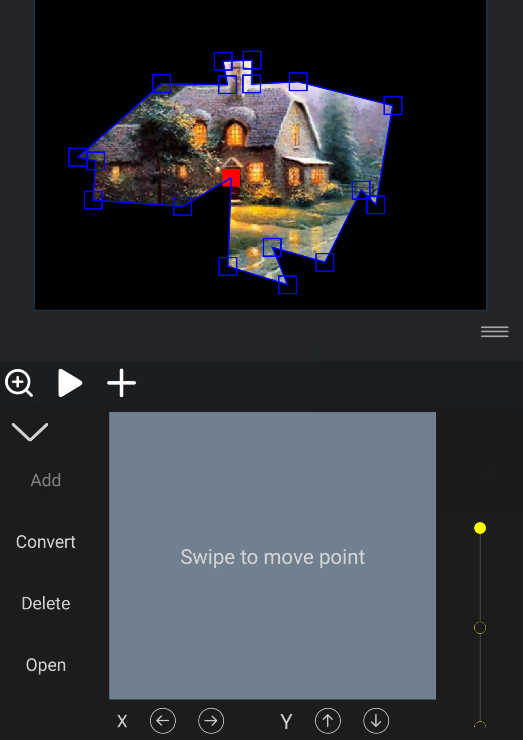
A mask in the software is a path used as a parameter to modify layer attributes, effects, and attributes. The most common use of masks is to modify the alpha channel of a layer to determine the transparency of the layer for each pixel. You can draw masks with common geometric shapes (including polygons, ovals, and stars), transparent background pictures, or use the pen tool to draw arbitrary paths. (See Pen tool to create custom shape layers.)
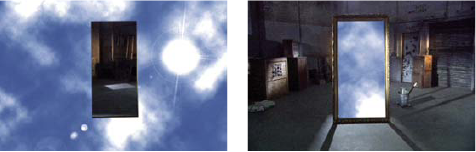
Default behavior for a drawn mask (left); same mask inverted (right)
Closed path masks create transparent areas for layers. Open paths cannot create transparent areas for layers. Effects that can use closed masks instead of open masks as input include strokes, fills, and reshapes.
Masks belong to specific layers. Each layer can contain multiple masks.
The mask's Transparency property determines how the closed mask affects the alpha channel of the layer within the mask area. A mask transparency value of 100% corresponds to an opaque inner area. The area outside the mask is always transparent. To reverse the inner and outer areas of a particular mask, click the Reverse button.

2. Create a mask
To create a mask, follow these steps:
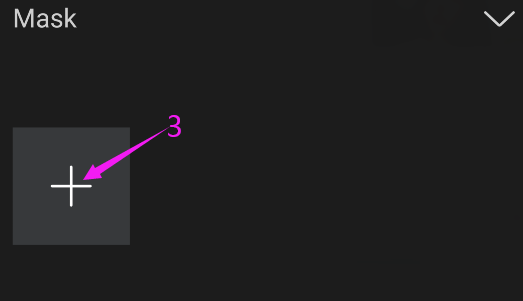
① Click the layer to be masked, and click the mask button.

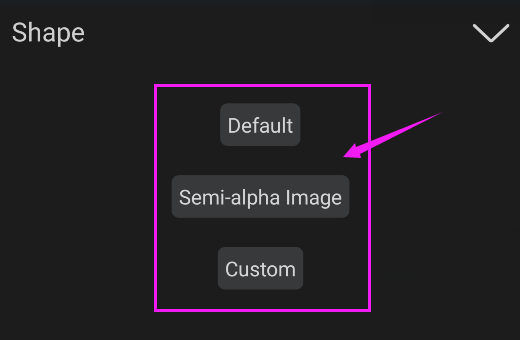
② Click the "+" sign, and then click the Default or Semi-alpha Image or Custom.
For default and custom shapes, see Creating custom shapes with the Pen tool.)
Semi-alpha Image refers to the edge of the picture is drawn to form a mask path.
To add more masks, click the + sign next to the mask shape.
Note : Among them, once the text layer and shape layer are turned on in 3D, after adding the thickness, the mask buttons will not be displayed, no new mask can be added, and the mask added on the previous layer will not work.
3. Copy, edit, and delete masks
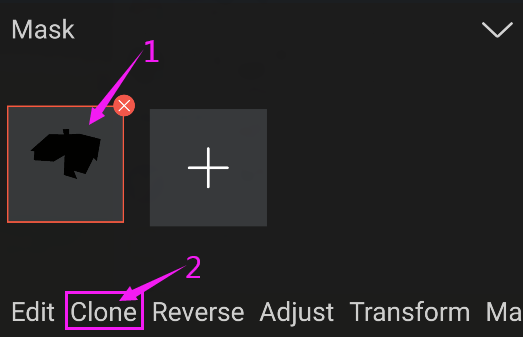
● To copy a mask, select the mask shape and click the Clone button.
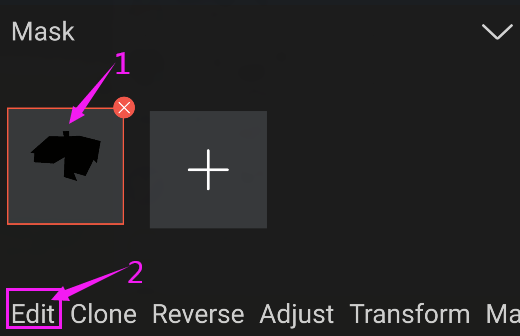
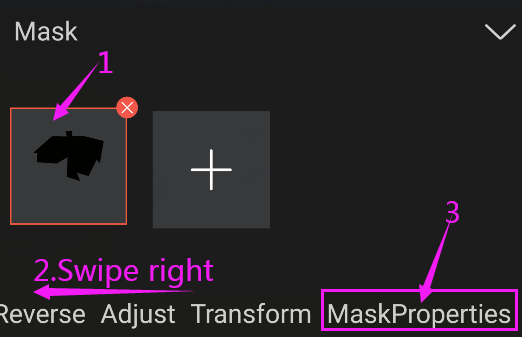
● To edit a mask, select the mask shape, then click the Edit button or right the menu bar and click the MaskProperties, and click the pencil button next to the Path attribute name.

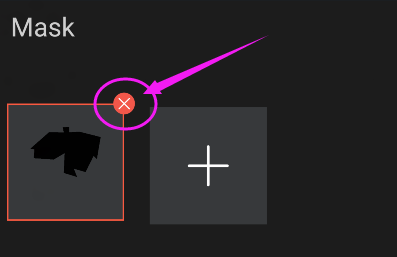
● To delete a mask, select the mask shape and click the  icon in the upper right corner of the mask shape.
4. Expand or contract the edges of a mask
To expand or shrink the area affected by the mask, click the MaskProperties and click the pencil button next to the mask's Extend attribute name to modify the value.


Mask expansion affects the alpha channel but not the underlying mask path; the mask expansion is essentially an offset that determines how far, in pixels, from the mask path the influence of the mask on the alpha channel extends.
You can scrub the Mask expansion values up to 200, and scrub down to -200. Values over 200 can only be entered manually or adjusted for fine-tuning values.
5. Mask transparency
y default, all masks are set to Add, which combines the transparency values of any masks that overlap on the same layer. The effect of a template depends on the mask higher in the stacking order and the transparency of the mask.
To modify the transparency of the mask, click MaskProperties, then click the pencil button next to the Alpha property name of the mask to modify the value.
