Pen tool to create custom shape layers
The simplest path that you can draw with the Pen tool is a straight line, made by clicking with the Pen tool to create two vertices. By continuing to click, you create a path made of straight-line segments connected by corner points.
1. Create custom shapes and layers
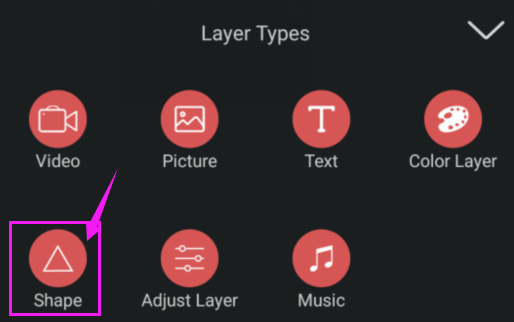
● Click the "+" sign next to the play button, then click Shape > Custom,then draw the shape you need.
Custom shapes require drawing a path with the Pen tool. Drawing a mask path is similar to drawing a shape path.(See About paths.)


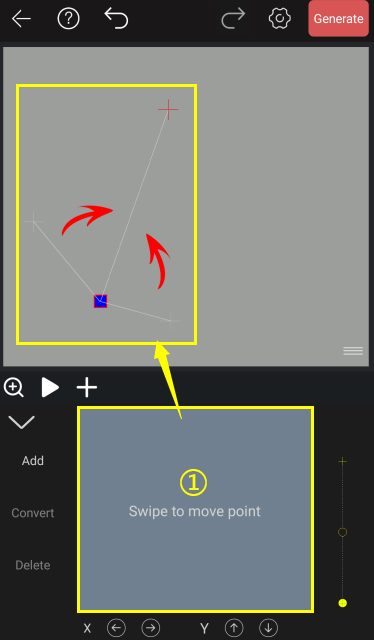
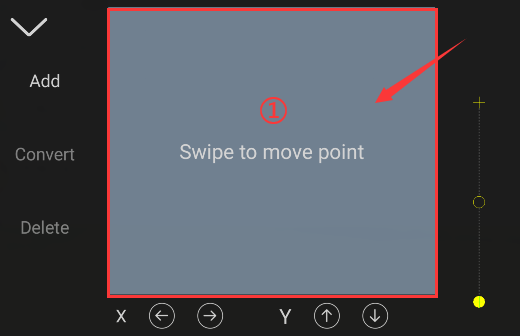
The first vertex is generated by default after entering the custom shape editing page for the first time.
1.1 Select the vertices.
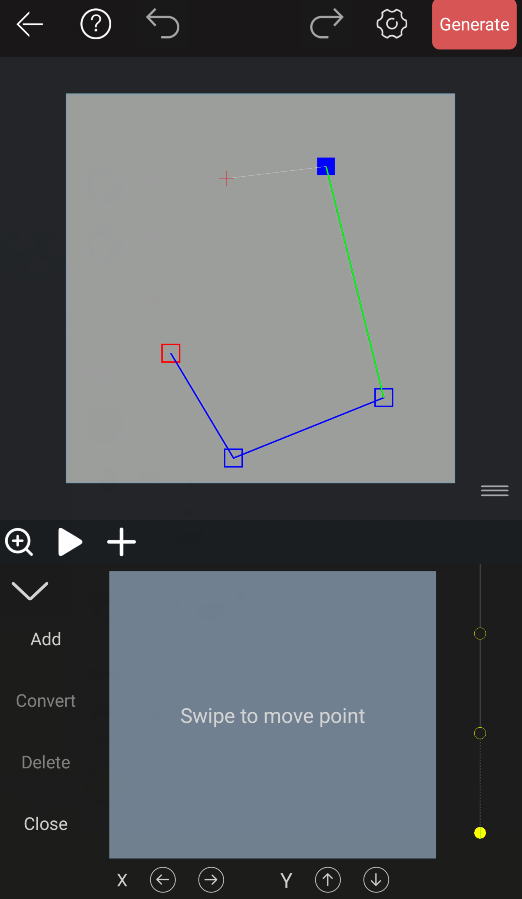
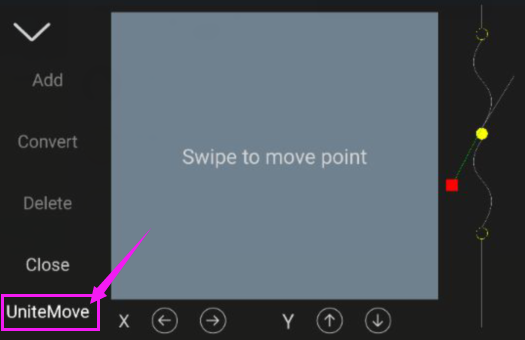
The two areas circled by the purple frame are one-to-one corresponding and synchronized (bottom).
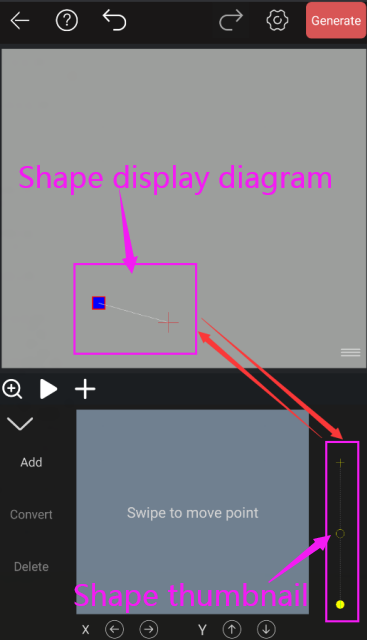
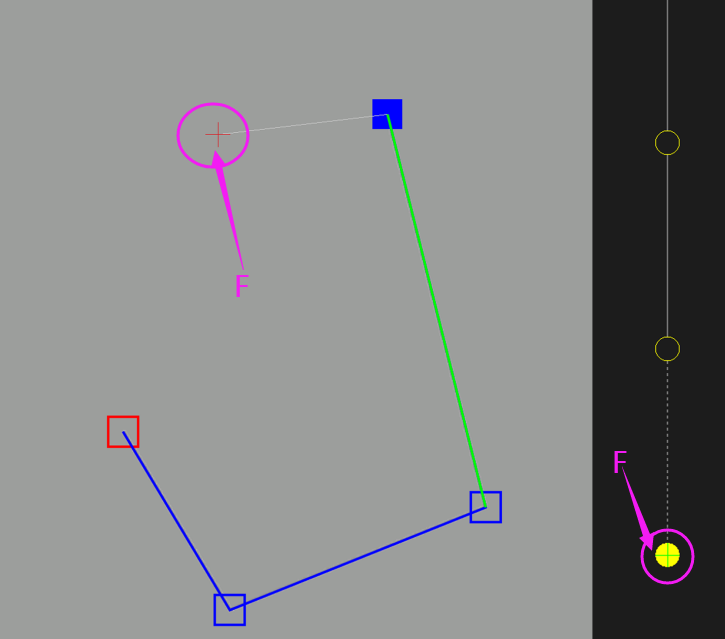
The following two pictures are the comparison between the shape display and the shape thumbnail.
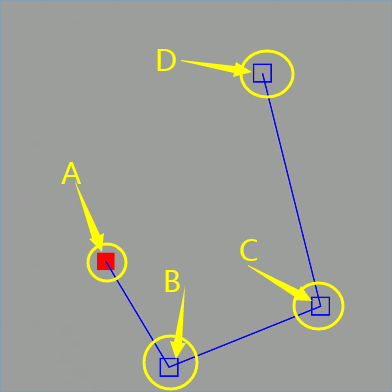

Vertex A in the two pictures above is selected.
A. The first vertex (start) B. The second vertex. C. The third vertex. D. The fourth vertex (end).
In the figure above, A refers to the same vertex, B refers to the same vertex, and so on.The line segment between the two vertices on the shape thumbnail is the line segment between the two vertices on the shape display graph.
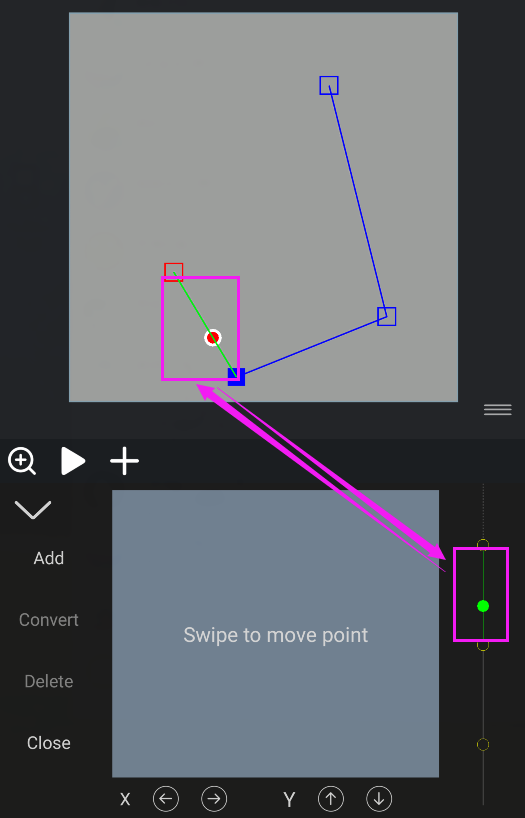
The box and circle of the vertex A are solid, which represents that this vertex is selected.
To select vertices, there are 2 ways:
● Click the box or circle vertex on the shape display or shape thumbnail directly.
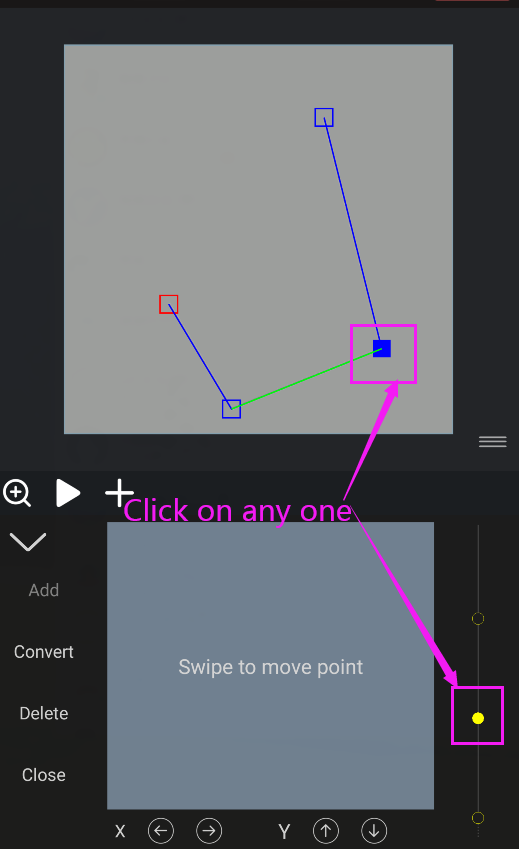
● Slide the shape thumbnail up or down until the vertex is selected.
The selected vertex is a blue solid box in the shape display, and a yellow solid circle in the shape thumbnail.
For easy differentiation, the box and selected state of the starting vertex are both red.
When the dots on the shape thumbnail are not on the vertices, the dots and line segments on the shape thumbnail will be green.
1.2 Move the vertices.
To move vertices, there are 3 ways:
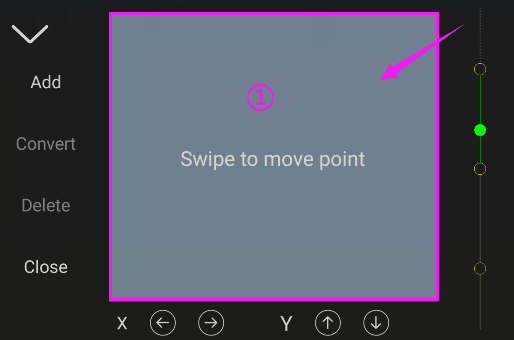
● After selecting the vertices, swipe to move the vertices in the area of ①.
● After selecting the vertices, press and move the selected vertices in the B panel.

● After selecting the vertex, click the X, Y axis arrow buttons below the area of ①.
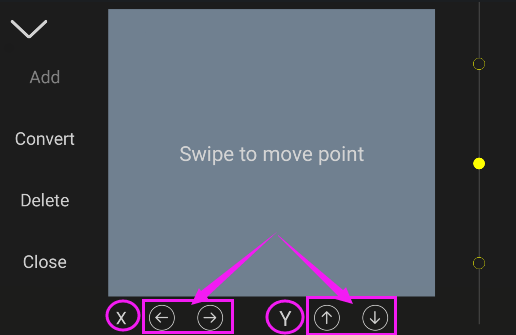
Each click of the arrow vertex position moves 1 unit.
1.3 Add new vertices
● When the shape is not closed, you can add new vertices at the top and bottom vertices of the shape.
1. In the shape thumbnail, select the + sign that extends from the top vertex or the tail vertex.

E. Add vertices at the starting vertex (top).
F. Add vertices at the end vertices (top).
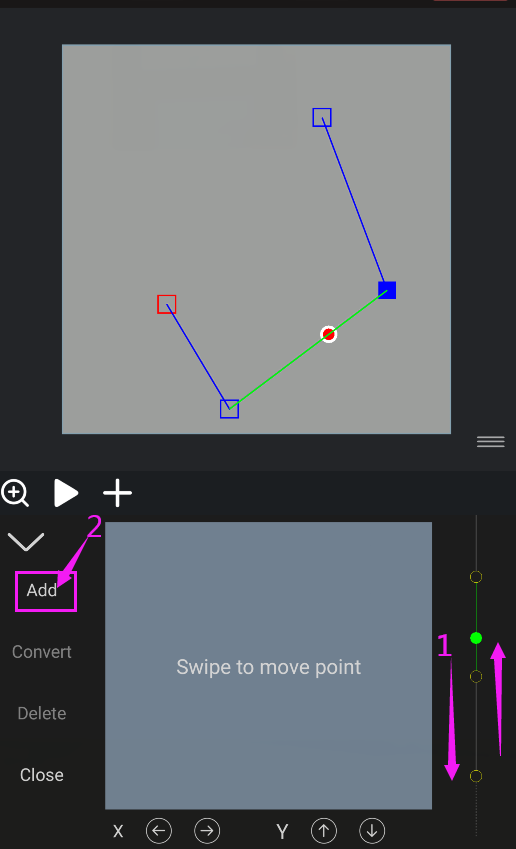
2. Slide in the area of ① in the figure below to control the angle and distance of adding a new vertex in the B panel.
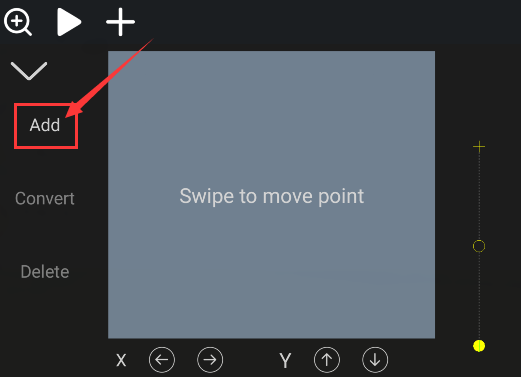
3. After determining the position of the new vertex, click the Add button on the left of the ① area or click once anywhere in the ① area.
4. Repeat step 2 to add new vertices.
● New vertices can be inserted between 2 key points.
1. Slide the shape thumbnail up or down until the small dot stays where you want to add a new vertex, click the Add button or click once anywhere in the ① area.
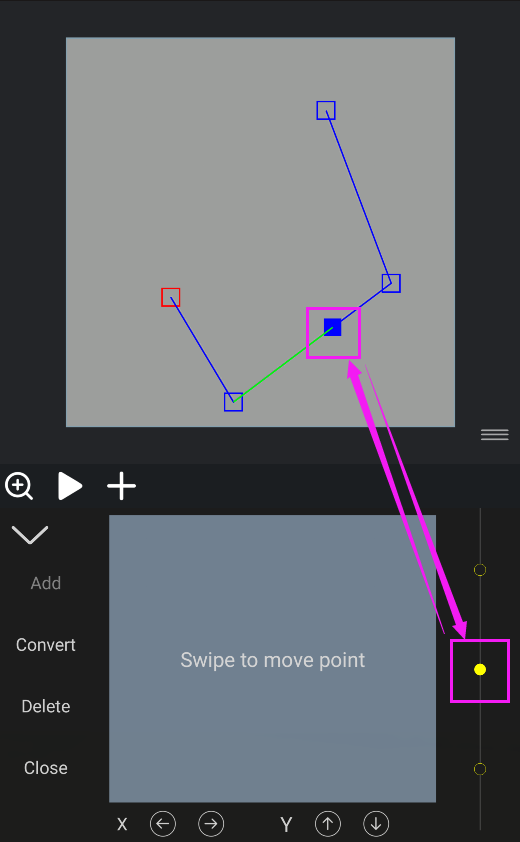
The last vertex added will appear as a solid-colored square, indicating that it is selected. As you add more vertices, previously added vertices will become empty and deselected.
1.4 Close or open the shape
Closing a shape is to connect the first vertex and the last vertex of an open shape with a straight line.
Opening a shape is to disconnect the straight line connecting the first vertex and the last vertex of the closed shape.
1. To close the shape, click the close button to the left of the ① area.

When the shape is closed, the close button is converted to an open button.
2. To open the shape, click the open button to the left of the ① area.
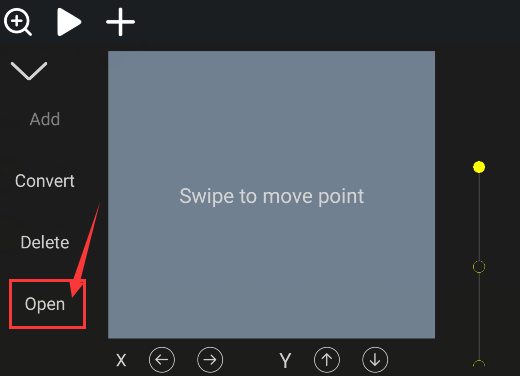
Note : Shapes with less than 3 vertices cannot be closed, and there is no close button on the left side of the ① area.
Note : The convert and delete buttons are only available when there are vertices selected, and the buttons are grayed out when no vertices are selected, that is, they are not available.
1.5 Delete the vertices.
Deleting vertices can delete any vertices of the shape, including the top and bottom vertices and the middle vertices.
● To delete a vertex, first select the vertex and click the delete button on the left of the ① area.

When the selected vertex is deleted, the next vertex of the deleted vertex is selected according to the order of adding fixed points. If the first vertex is deleted, the next vertex becomes the first vertex.
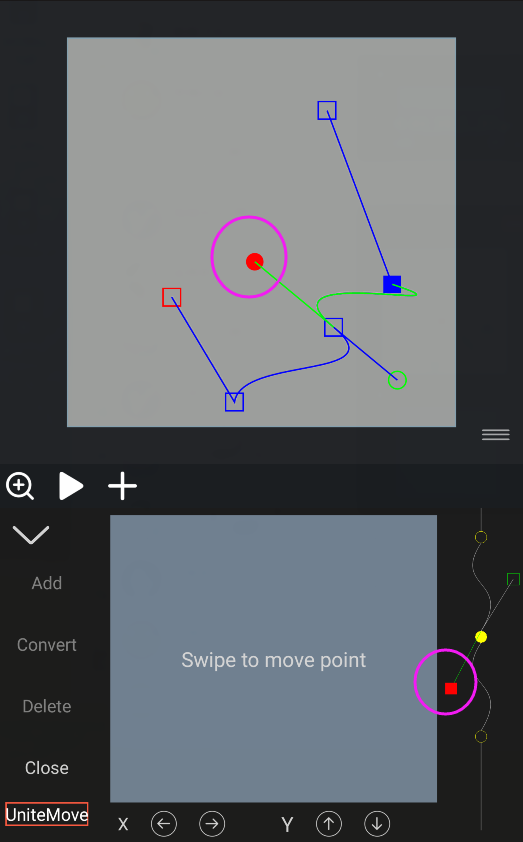
1.6 Convert the vertices.
The transformation is to transform the straight segment path on the vertex 2 side into a curved segment path.
The length and direction of the direction lines determine the shape of the curve.
● Select the vertex and click the convert button on the left side of the ① area.


In the figure above, the straight line segment on the vertex 2 side becomes a curved segment, and two direction lines appear on the vertex 2 side. Both ends of the direction line have direction control handles.
In the shape display, the direction handles are 2 red-green circles, and in the shape thumbnail, the direction handles are 2 red-green boxes. This is the exact opposite of the display of vertices.
The selection method of the direction handle is the same as that of the vertex. When selected, the direction handle will be displayed as a solid circle or square, indicating that it is selected.
● To modify the direction and camber of a curve, first click to select the vertices, then click to select the direction handle, and press and hold the direction handle in the B panel to move.
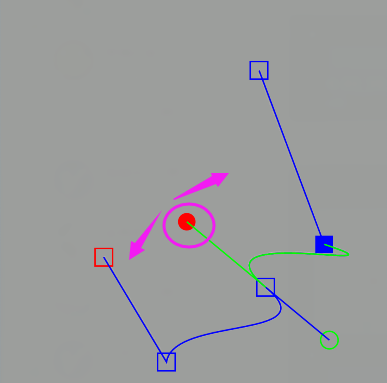

The two direction lines are interrelated, that is, when one direction line is changed, the other direction line will also be changed synchronously.
If you need to control one direction line independently without affecting the other direction line, before changing the direction line, click the simultaneous movement button that appears on the left side of the ① area to cancel the association.
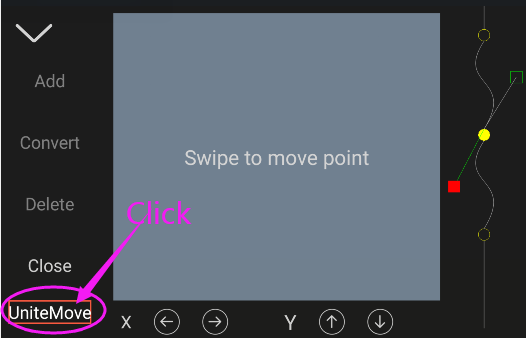
To continue associating the two direction lines, click the button that moves at the same time again.
Cancel vertex transformation
To convert a curved segment to a straight segment, select the vertex and click the Convert button.

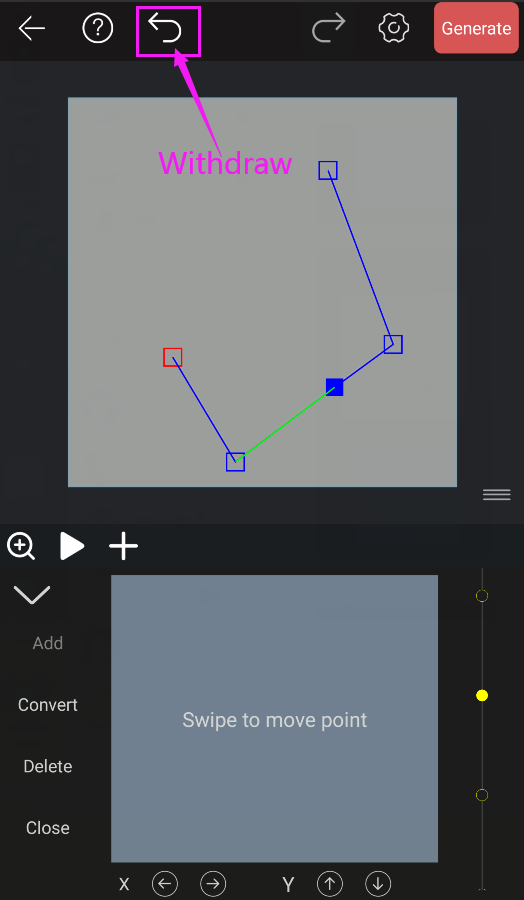
In case of accidental deletion, moving vertices, etc., please click the withdraw button on the upper left side of the page.